How to Enable Google Analytics 4 (GA4) on Your Website: Full Setup Guide + Next.js

Google Analytics 4 (GA4) helps you understand who visits your site, what they do, and which content or pages drive results. This guide walks you through creating an Analytics account and property in the Google UI, then wiring the official Google tag (gtag.js) into a Next.js app so Tag Assistant and GA’s setup flow can detect your implementation. Screenshots use placeholder images — replace them under public/blogs/enable-google-analytics-nextjs/ with your own captures for a polished publish.
What you’ll need
A Google account, access to your site’s production domain, and a Next.js project using the App Router. Your Measurement ID looks like G-XXXXXXXXXX — you’ll copy it from Analytics after you create a web data stream.
Part 1 — Create your Google Analytics account and property
If you don’t already use Analytics, open Google Analytics and start the setup flow. You can also go directly to the provision / create experience when signed in.
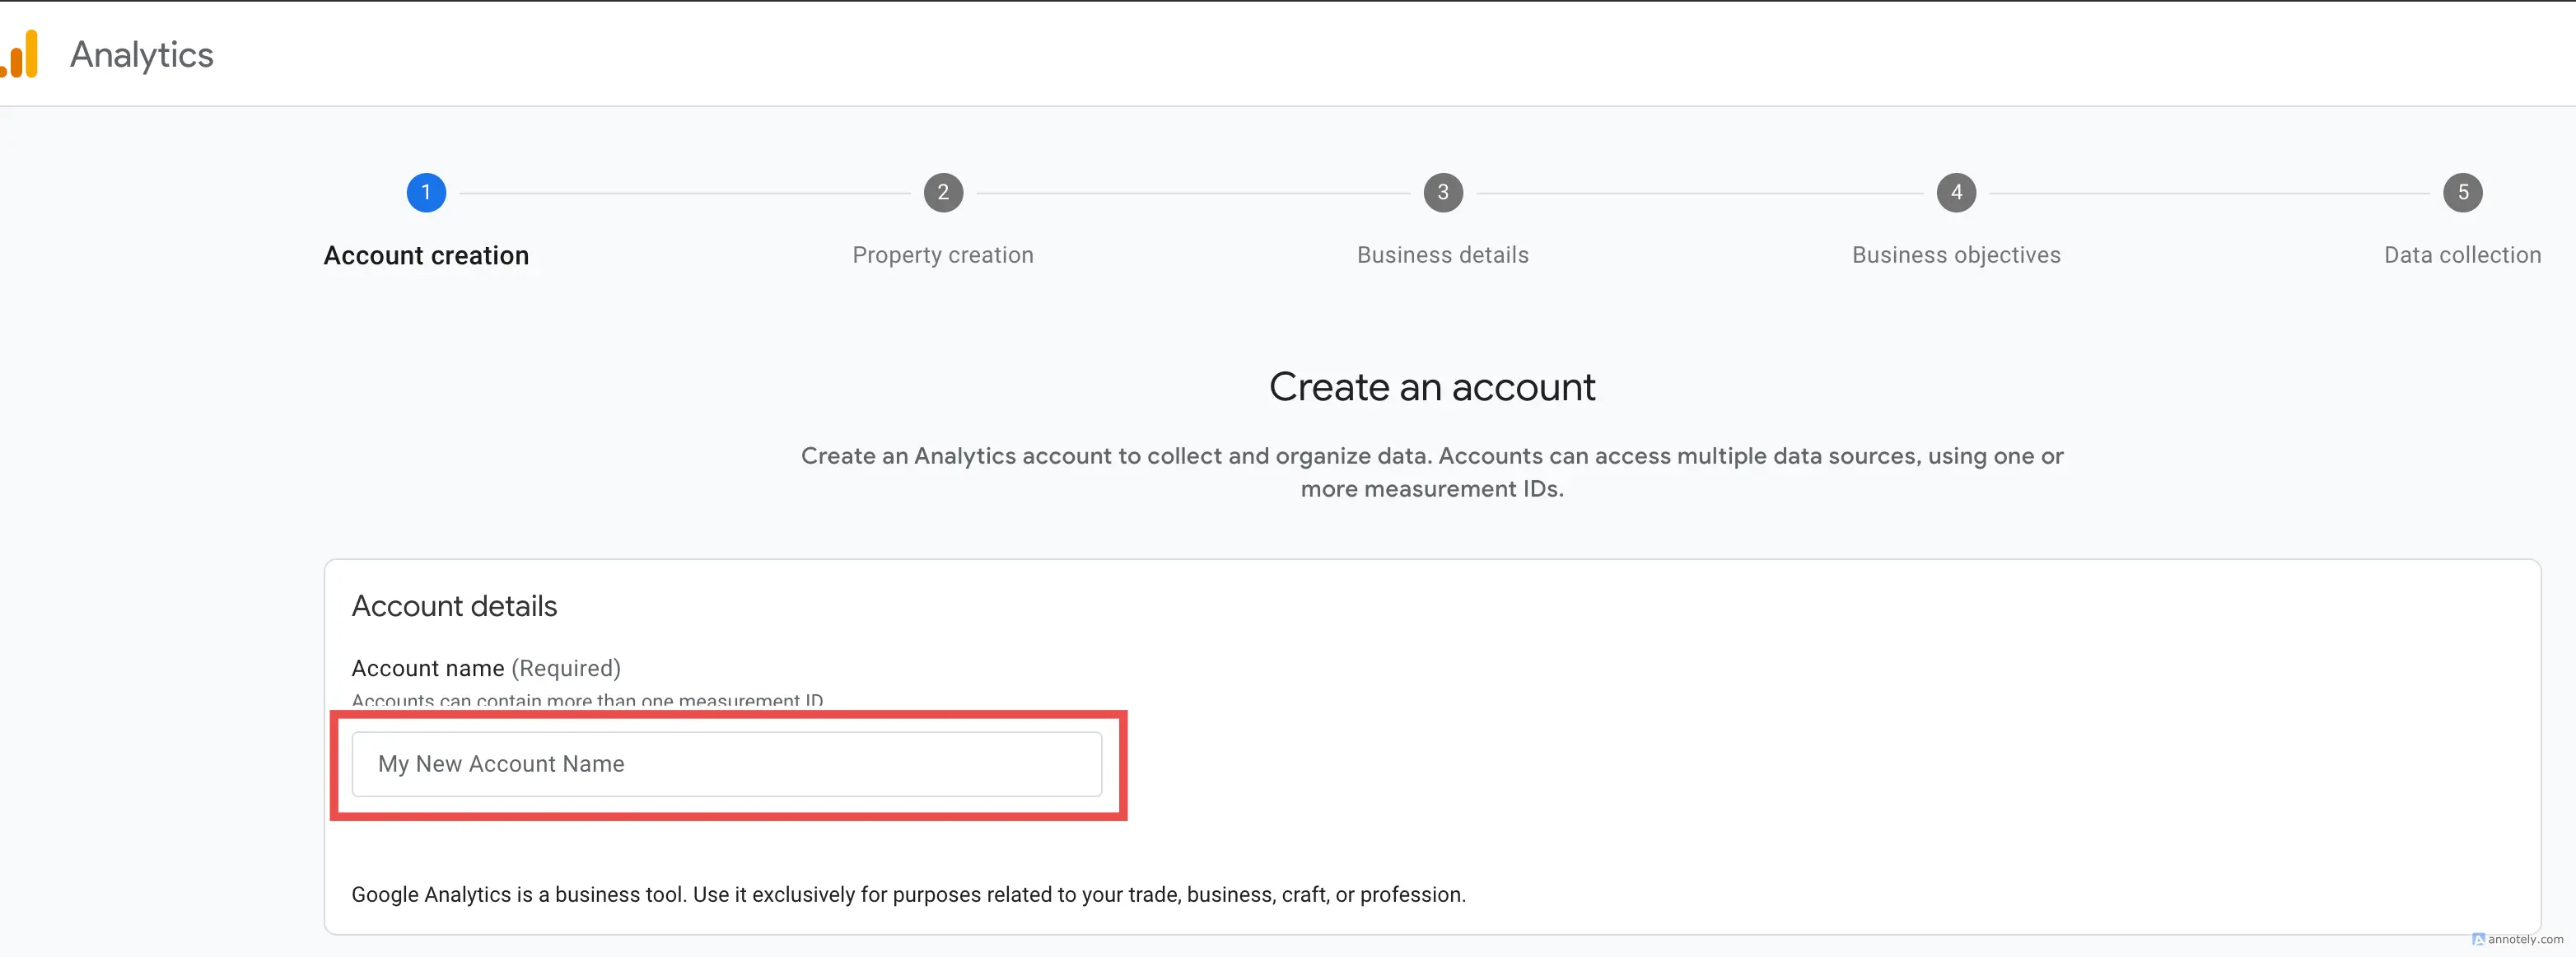
Step 1 — Create an account
Enter an Account name (often your company or personal name). This is the top-level container; you can hold multiple properties under one account. Complete any account data-sharing options Google presents, then continue.
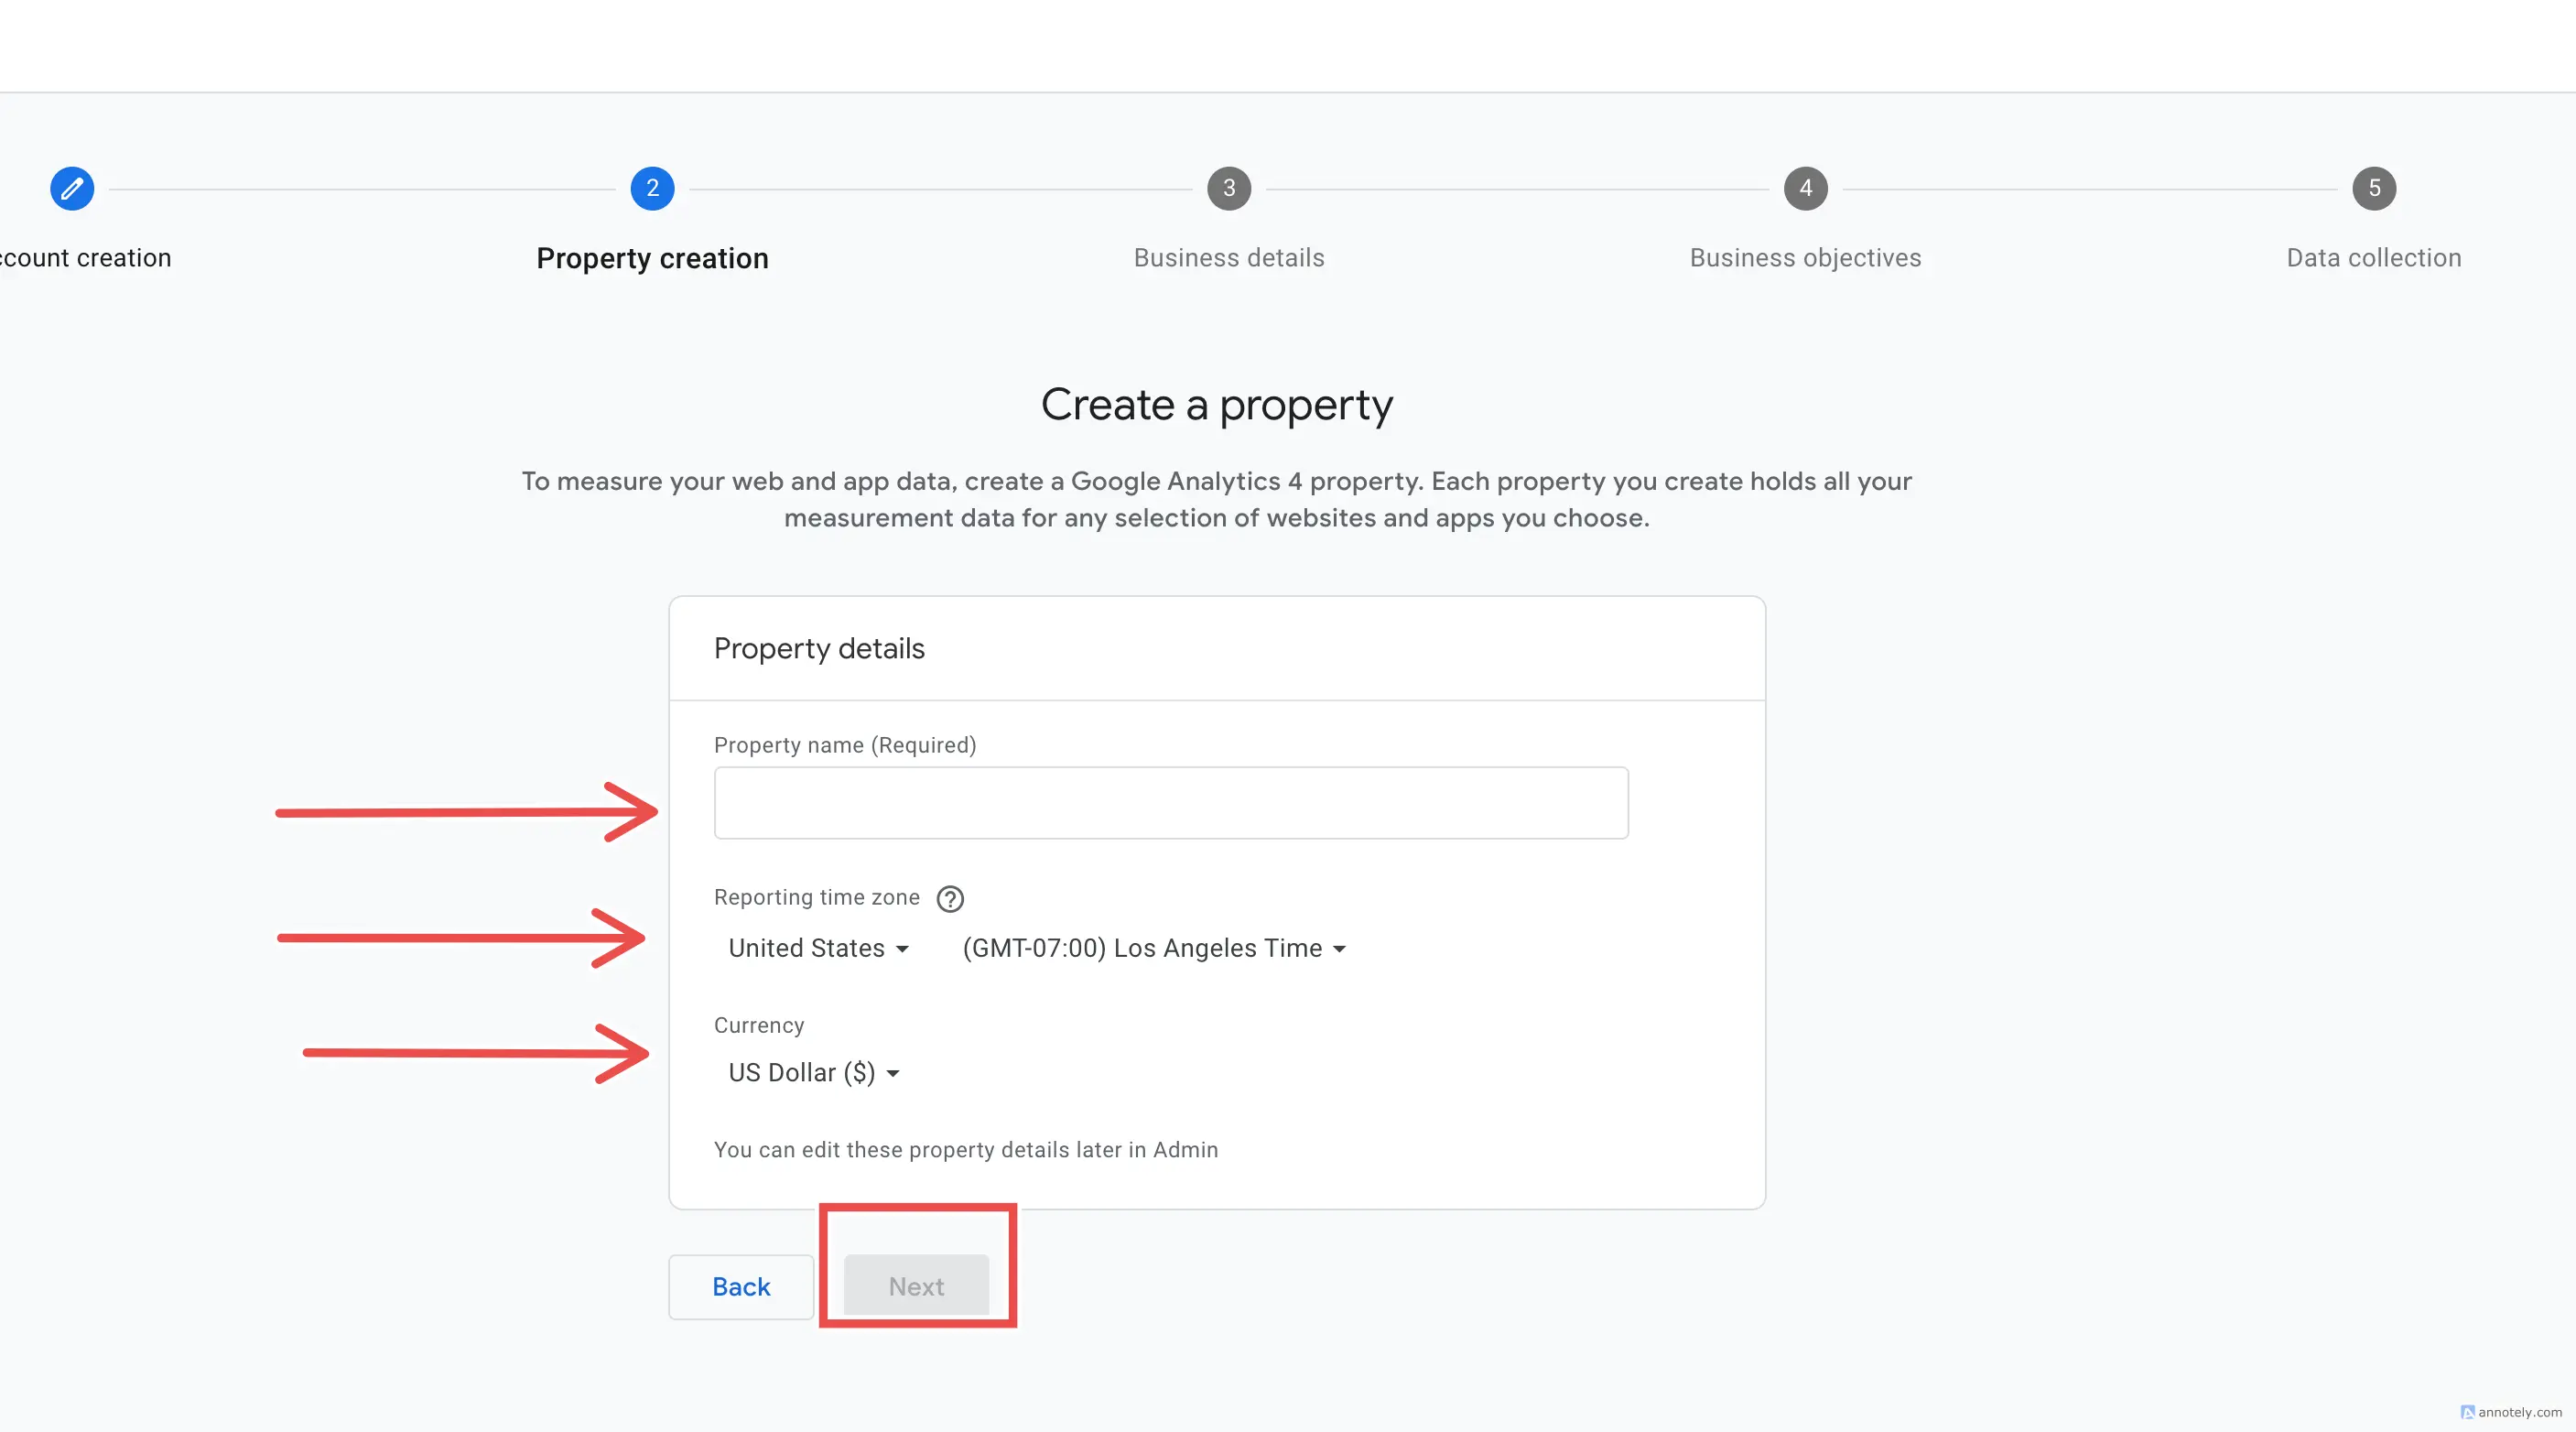
Step 2 — Create a property
A property groups the websites and apps you want to measure together for reporting. Enter a Property name (required), choose your Reporting time zone and Currency, then move to the next step. Most solo developers and small teams choose a single property per main product or site.
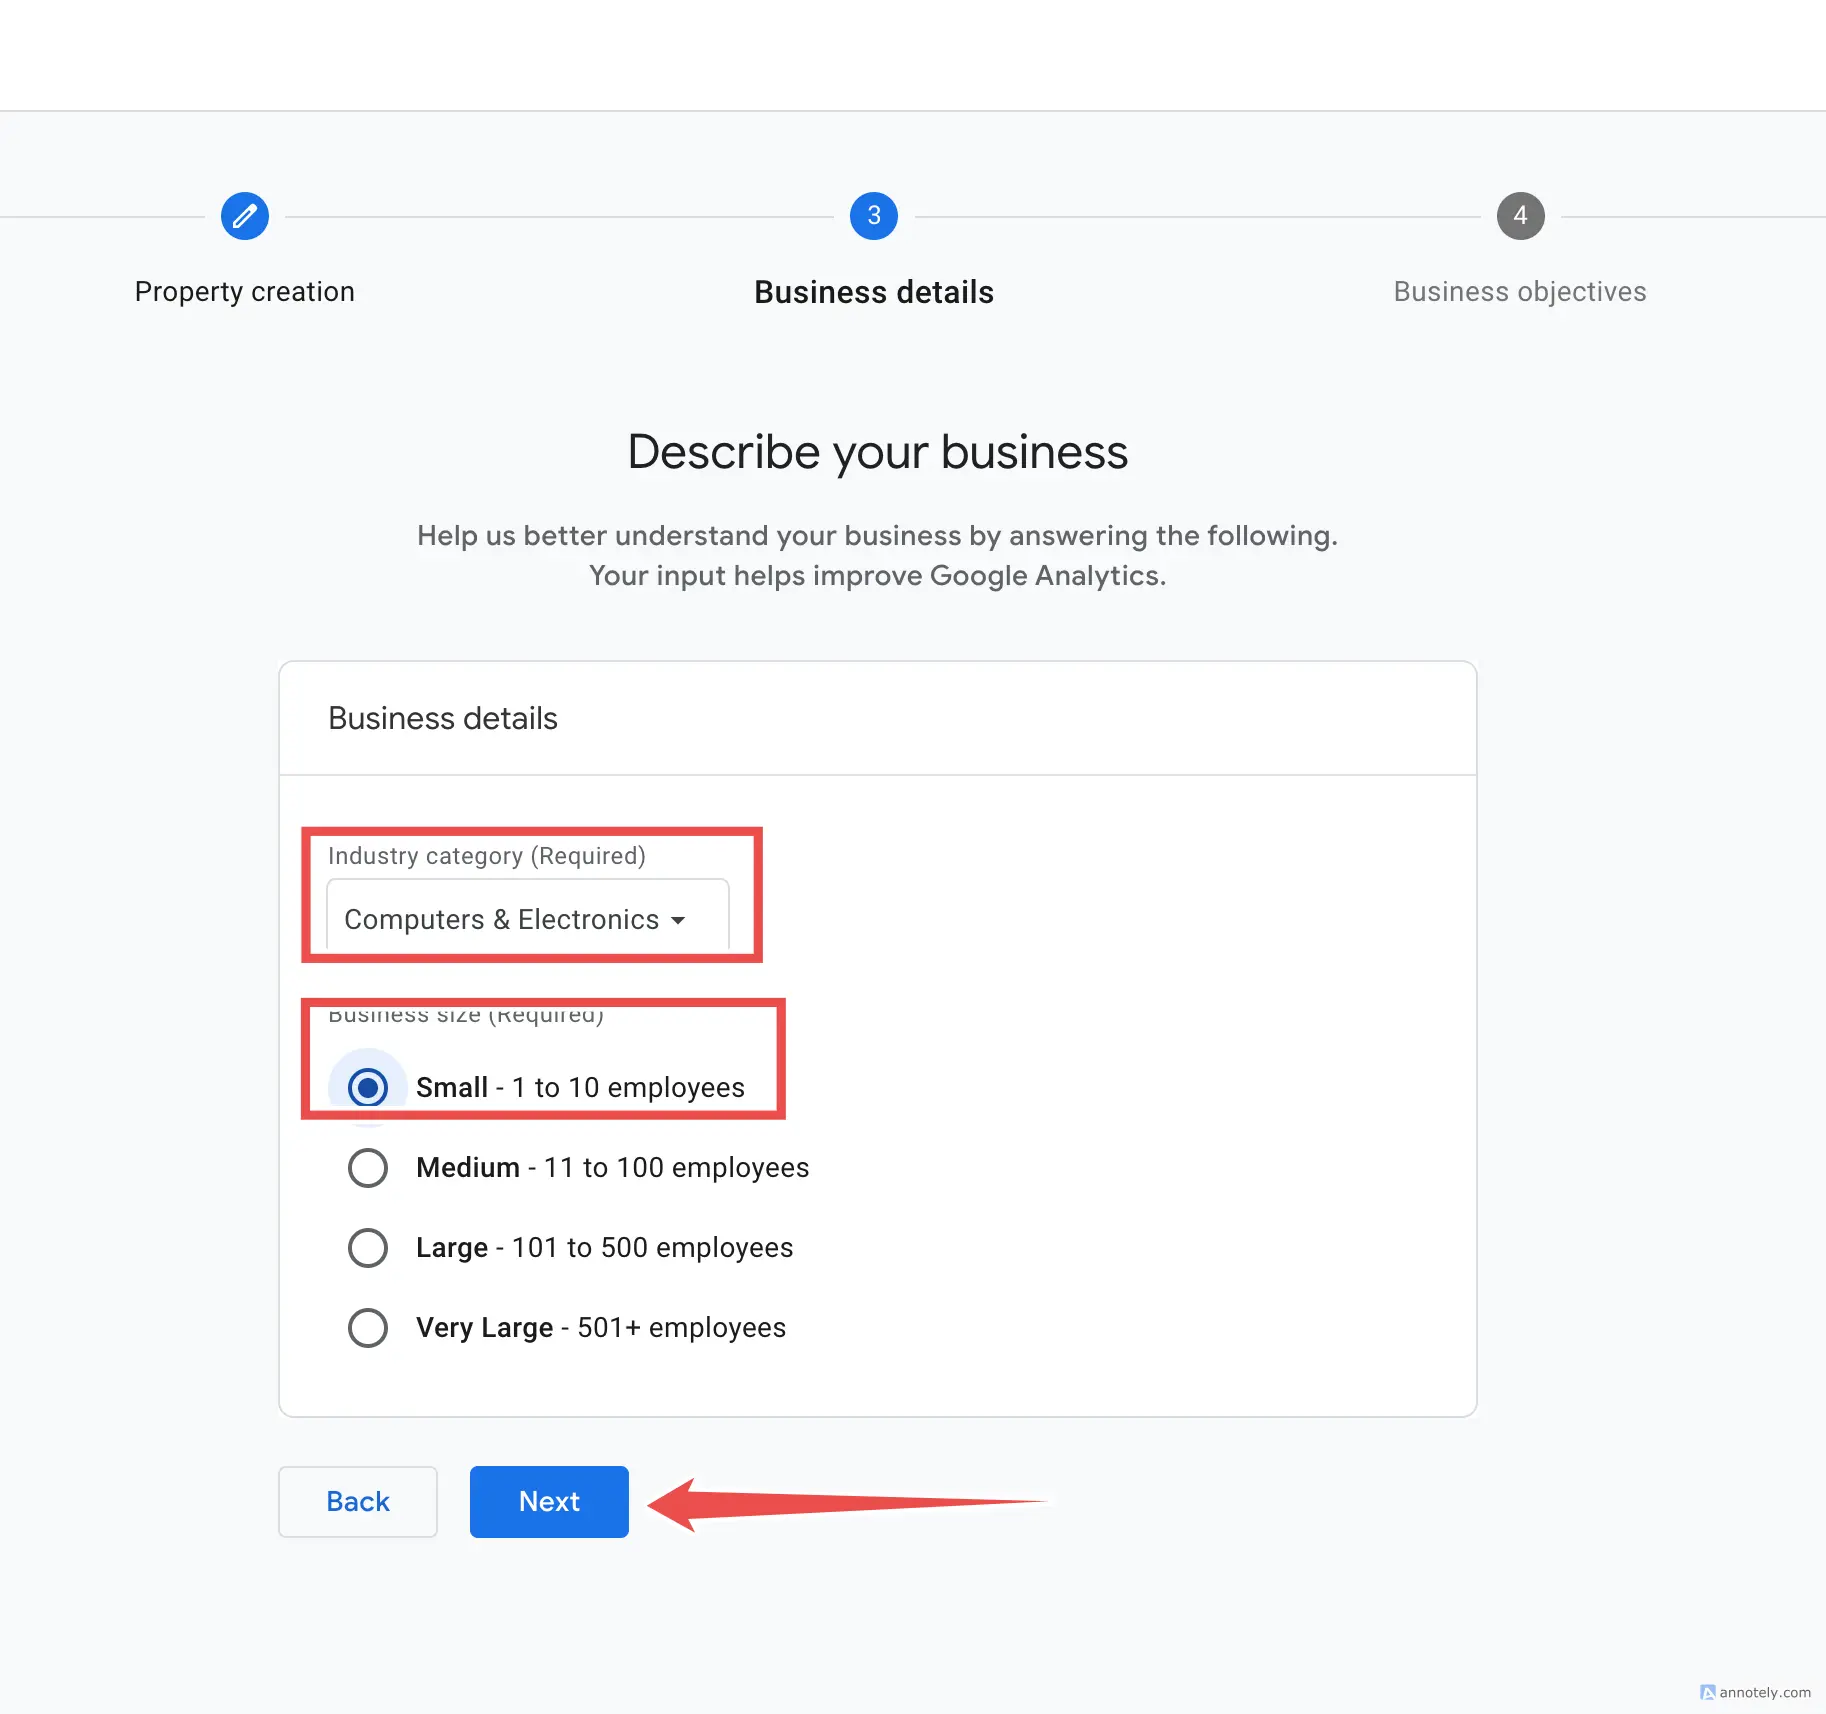
Step 3 — Describe your business
Google uses Industry category and Business size to tailor default reports and benchmarks. Pick the options that best match your situation — for example, Technology and Small business (1–10 employees) — then continue.
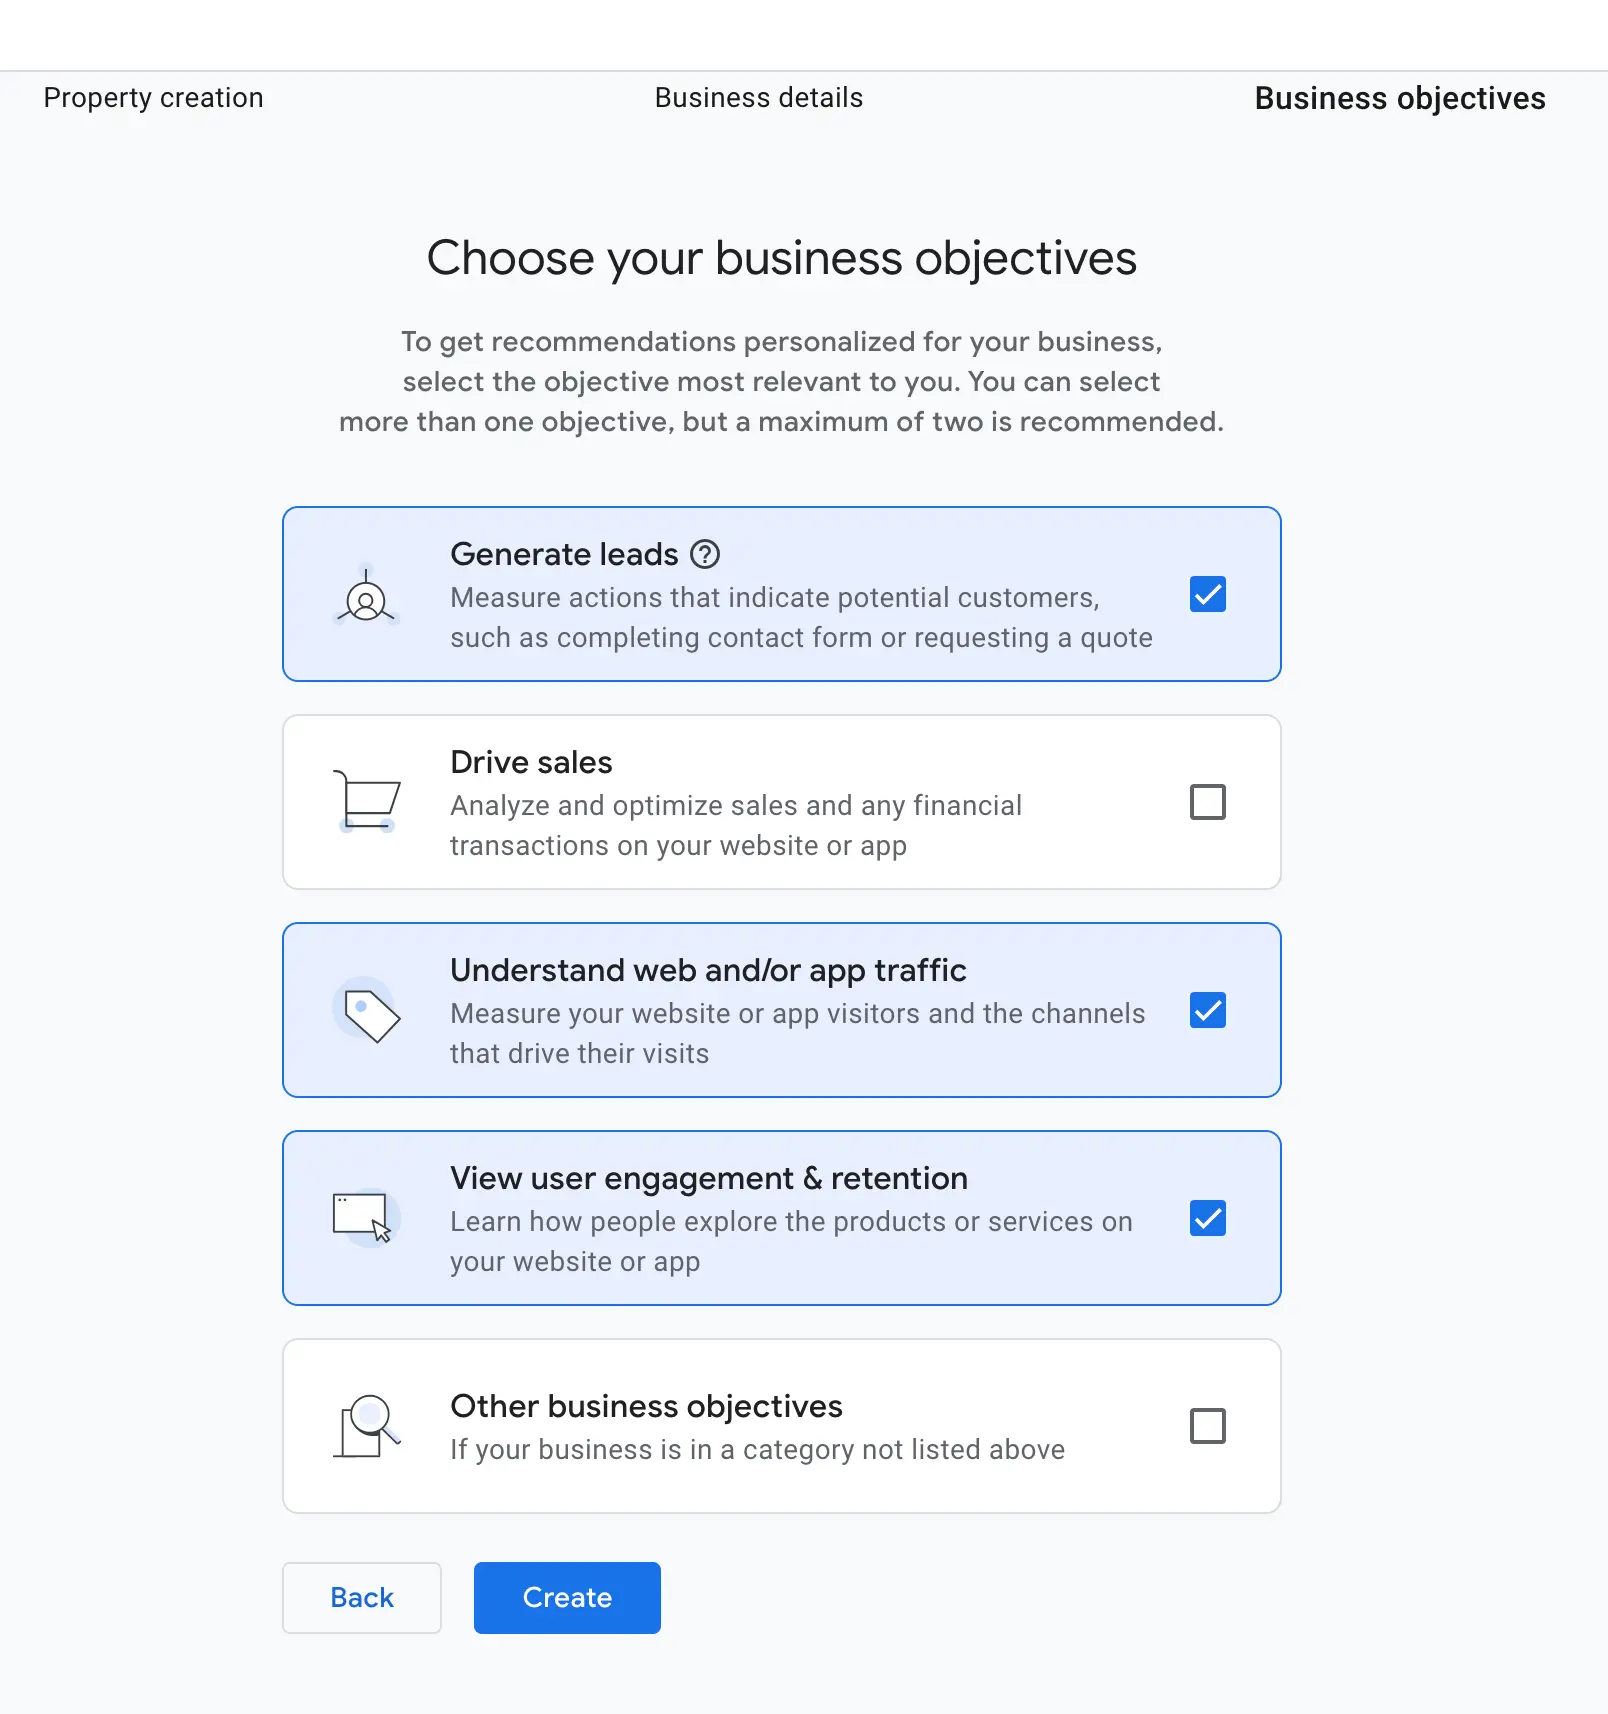
Step 4 — Choose your business objectives
Select objectives that match how you’ll use Analytics — for example Generate leads, Understand web and/or app traffic, and/or View user engagement & retention. You can adjust reporting later; these choices tune the initial UI. Accept the terms if prompted.
Step 5 — Start collecting data (web stream)
When asked for your platform, choose Web. Enter your Website URL (use your canonical production URL, including https://) and a Stream name (e.g. Production site). Create the stream — this is what exposes your Measurement ID for the Google tag.

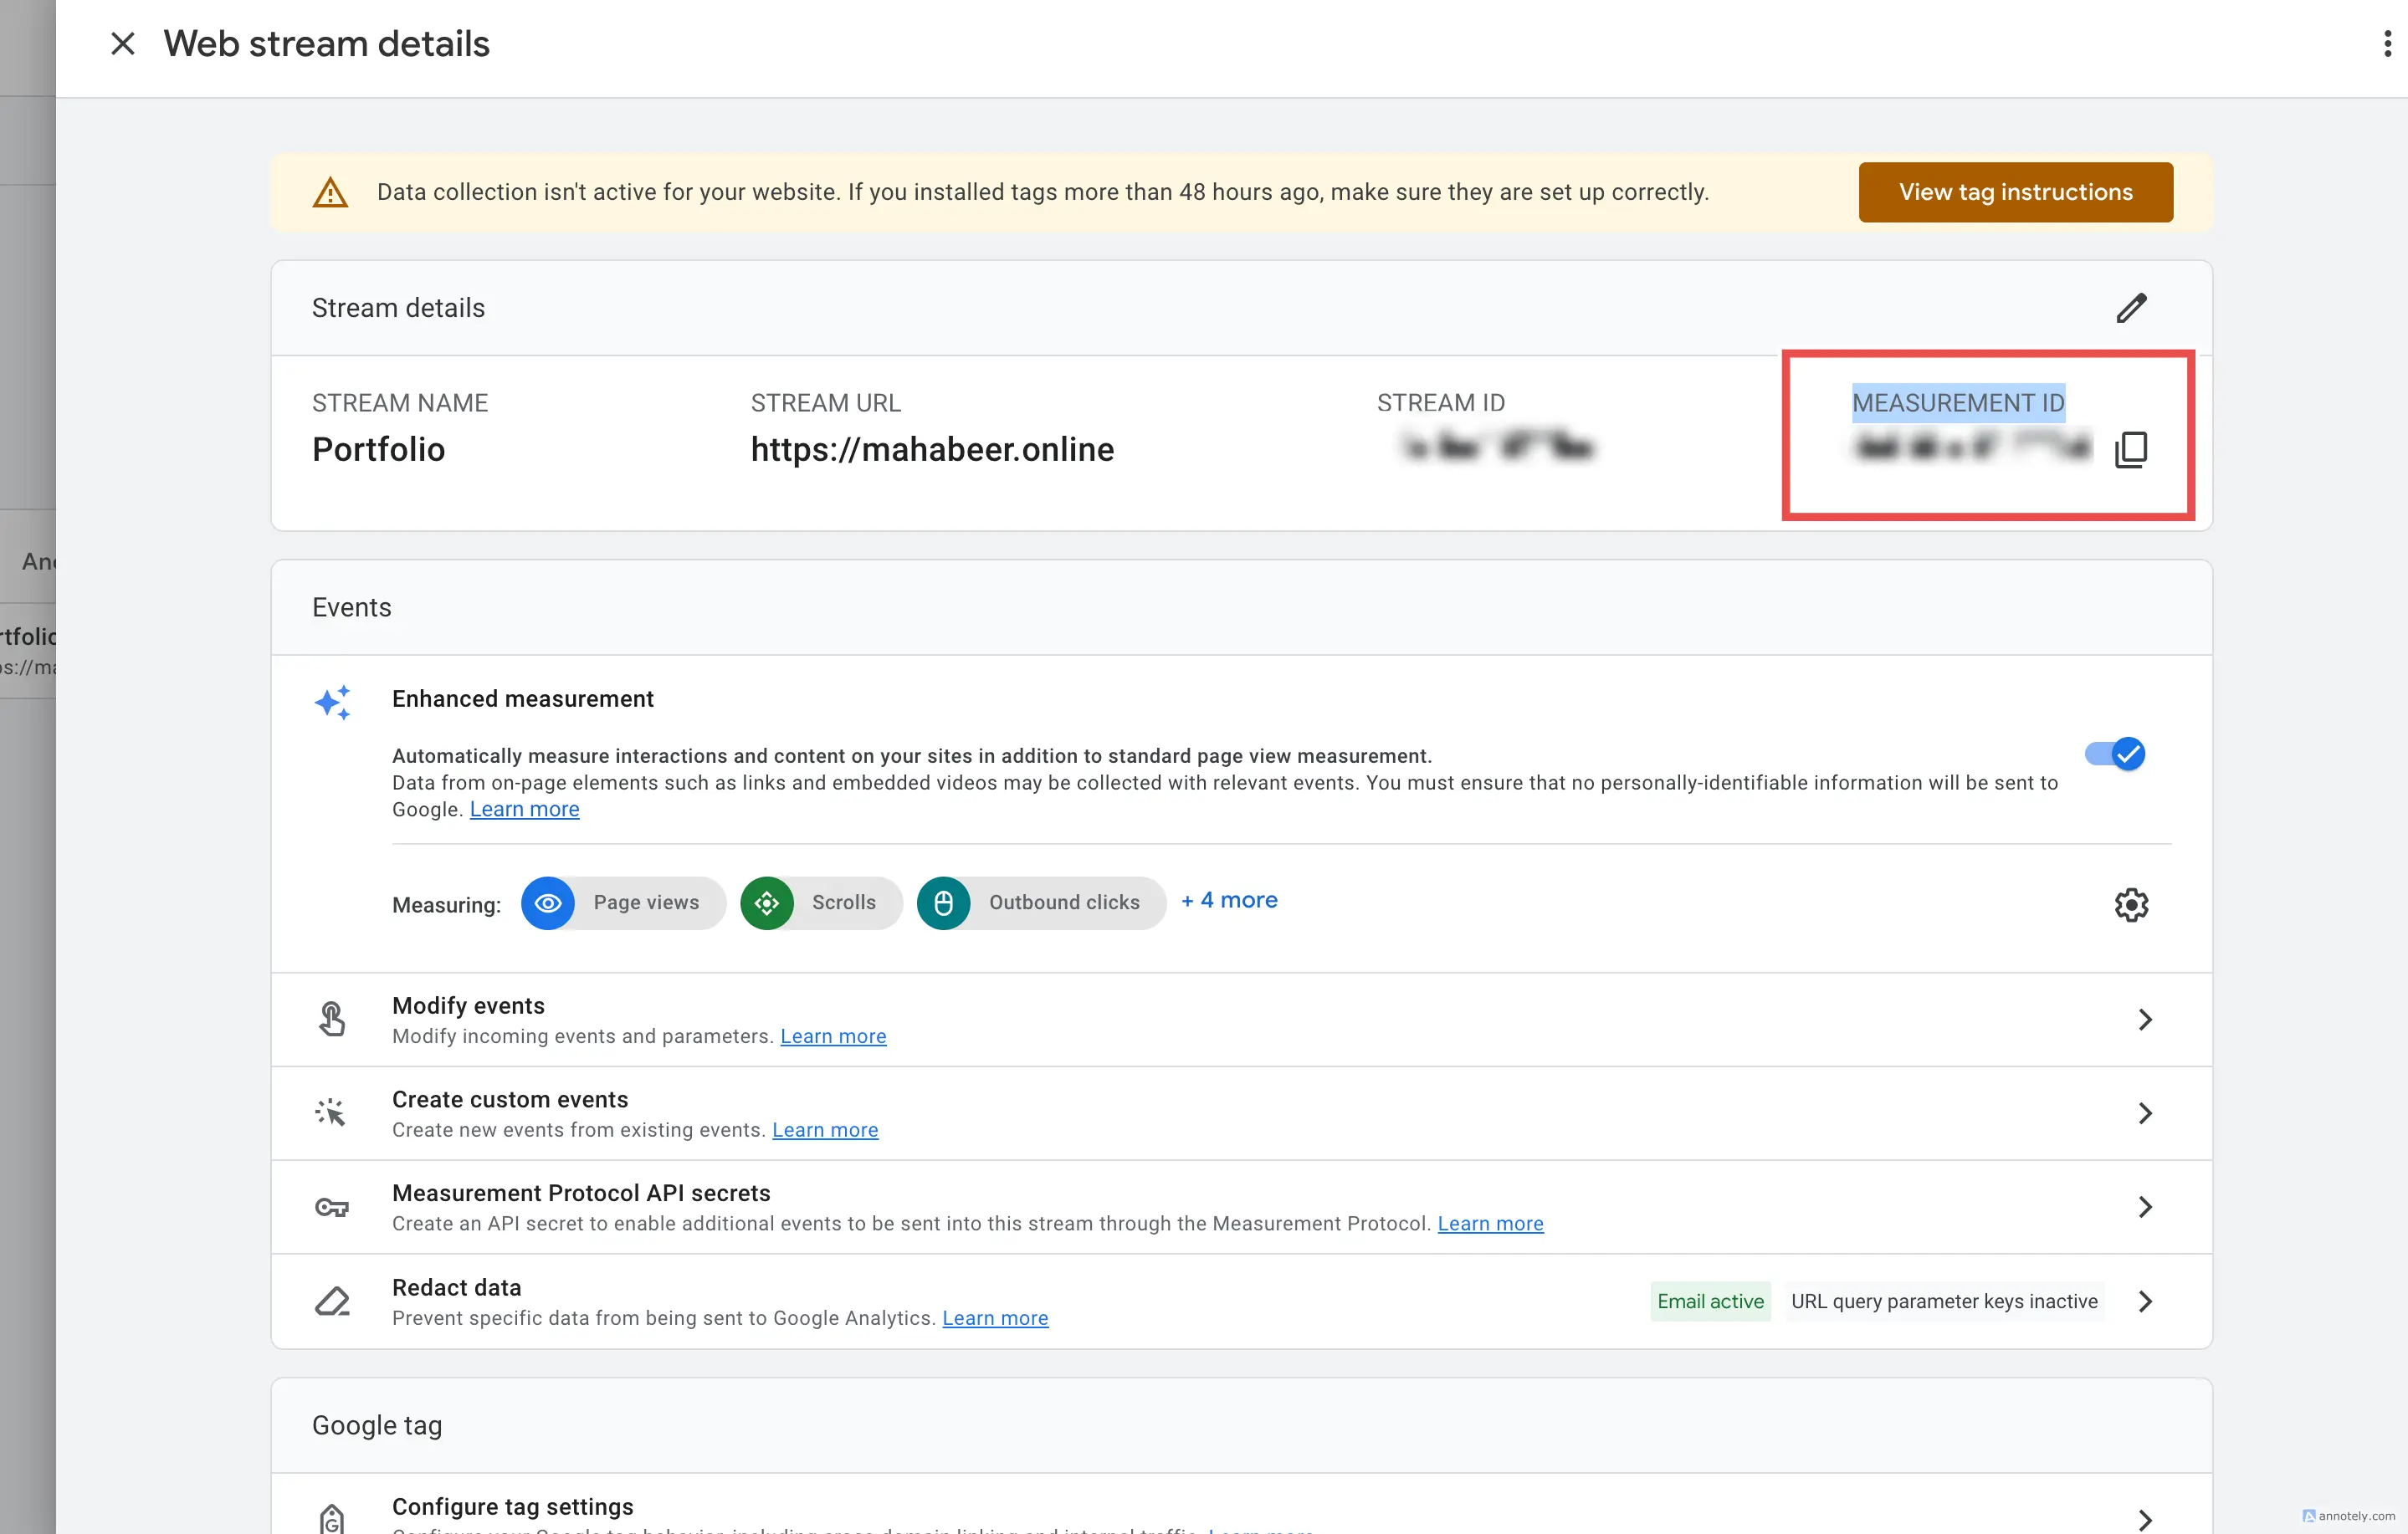
Step 6 — Copy your Measurement ID
After the stream is created, open the stream details. Copy the Measurement ID (format G-XXXXXXXXXX). You’ll paste this into an environment variable in your Next.js project. Treat it as non-secret but don’t rotate it casually — changing streams changes historical continuity in reporting.
Part 2 — Configure environment variables
In Next.js, values exposed to the browser must use the NEXT_PUBLIC_ prefix so they are inlined at build time. Use .env.local locally (and never commit secrets there). On Vercel, Netlify, or your host, add the same variables for Production and trigger a new deployment after saving.
# .env.local (example)
# Required for GA4 in production builds
NEXT_PUBLIC_GA_MEASUREMENT_ID=G-XXXXXXXXXX

# Optional: send events from `next dev` (default is off)
NEXT_PUBLIC_GA_ENABLE_IN_DEV=false
Aliases such as NEXT_PUBLIC_GTAG_ID or NEXT_PUBLIC_GOOGLE_ANALYTICS_ID can be supported if your codebase reads them — the important rule is the public prefix and a redeploy after changing values.
Part 3 — Centralize GA config in lib/analytics-config.ts
Keep environment reads in one module so your root layout stays readable and you can gate development traffic (avoid polluting real data during local development).
export function getGaMeasurementId(): string | undefined {
  const raw =
    process.env.NEXT_PUBLIC_GA_MEASUREMENT_ID?.trim() ||
    process.env.NEXT_PUBLIC_GTAG_ID?.trim() ||
    process.env.NEXT_PUBLIC_GOOGLE_ANALYTICS_ID?.trim();
  if (!raw) return undefined;
  return raw;
}

export function shouldInjectGoogleAnalytics(): boolean {
  const id = getGaMeasurementId();
  if (!id) return false;
  if (process.env.NODE_ENV === "development") {
    return process.env.NEXT_PUBLIC_GA_ENABLE_IN_DEV === "true";
  }
  return true;
}
Part 4 — Add the Google tag in app/layout.tsx
Use Next.js next/script with strategy afterInteractive so the tag loads after hydration without blocking first paint. The inline snippet must match Google’s recommended dataLayer + gtag bootstrap so Tag Assistant recognizes the installation.
Import Script from next/script, your helpers from @/lib/analytics-config, and a small client component (e.g. GaRouteReporter) that sends page_path on App Router navigations, since GA’s default first page_view does not always cover client-side route changes.
import Script from "next/script";
import {
  getGaMeasurementId,
  shouldInjectGoogleAnalytics,
} from "@/lib/analytics-config";
import { GaRouteReporter } from "@/components/ga-route-reporter";

// Inside RootLayout component, before closing </body>:
const gaId = getGaMeasurementId();
const loadGa = shouldInjectGoogleAnalytics();

return (
  <html>…
    <body>…
      {loadGa && gaId ? (
        <>
          <Script
            src={"https://www.googletagmanager.com/gtag/js?id=" + gaId}
            strategy="afterInteractive"
          />
          <Script id="google-gtag-init" strategy="afterInteractive">
            {`
window.dataLayer = window.dataLayer || [];
function gtag(){dataLayer.push(arguments);}
gtag('js', new Date());
gtag('config', '${gaId}');
            `.trim()}
          </Script>
          <GaRouteReporter gaId={gaId} />
        </>
      ) : null}
    </body>
  </html>
);
Part 5 — Deploy and verify
1. Set NEXT_PUBLIC_GA_MEASUREMENT_ID on your hosting provider. 2. Run a production build and deploy. 3. Open your live site, view page source or the Network tab, and confirm googletagmanager.com/gtag/js loads with your ID. 4. In GA4, open Reports → Realtime or Admin → DebugView (with Google’s debug extension if needed). Disable ad blockers while testing.
Common reasons GA says “tag not detected”
- Variable name missing the NEXT_PUBLIC_ prefix — the browser bundle never receives an ID. - Env added after build without redeploying — rebuild to embed the value. - Testing only on localhost with NEXT_PUBLIC_GA_ENABLE_IN_DEV left false — enable it or test on production. - Consent mode or CMP blocking the tag before consent — adjust your consent flow if you use one. - Ad blockers stripping the request — use Realtime with blockers off.
Privacy and compliance
If you serve users in the EU, UK, or other regions with strict privacy rules, pair Analytics with a proper cookie / consent strategy and document processing in your privacy policy. This article focuses on technical setup, not legal advice.
Conclusion
You’ve created a GA4 property, added a web data stream, copied your Measurement ID, and mirrored Google’s gtag.js implementation in Next.js using environment-driven configuration. Replace the placeholder images in public/blogs/enable-google-analytics-nextjs/ with real screenshots to strengthen trust and SEO, then submit updated URLs in Google Search Console if you track indexing separately.